The instructions that follow explain how to import files you downloaded from Ultra Librarian into OrCAD/Allegro PCB Editor v17.2.
Ensure that the version you select to download matches the software version that you have installed. Before you begin to import, extract the zipped download on the computer that has OrCAD/Allegro PCB Editor installed.
To import a PCB footprint and 3D model:
1.Open the product folder, OrCAD/Allegro PCB Editor. This file is included in the zip folder you downloaded from Ultra Librarian.
Note: You must already have OrCAD or Allegro software installed and running on the computer that created the batch file or you need to modify the path referenced in the batch file.
2.Double-click the AllegroV17_2.bat file name to run the batch file.
3.If an error message displays, edit the batch file as stated in steps 4 through 6 that follow so the file can reference the correct path. If the batch files run successfully, you are ready to open the new footprint or 3D model as explained in steps 7 through 8.
4.To edit the file path referenced within the AllegroV17_2.bat file, right click the file name and open the file in a text editor such as Notepad.
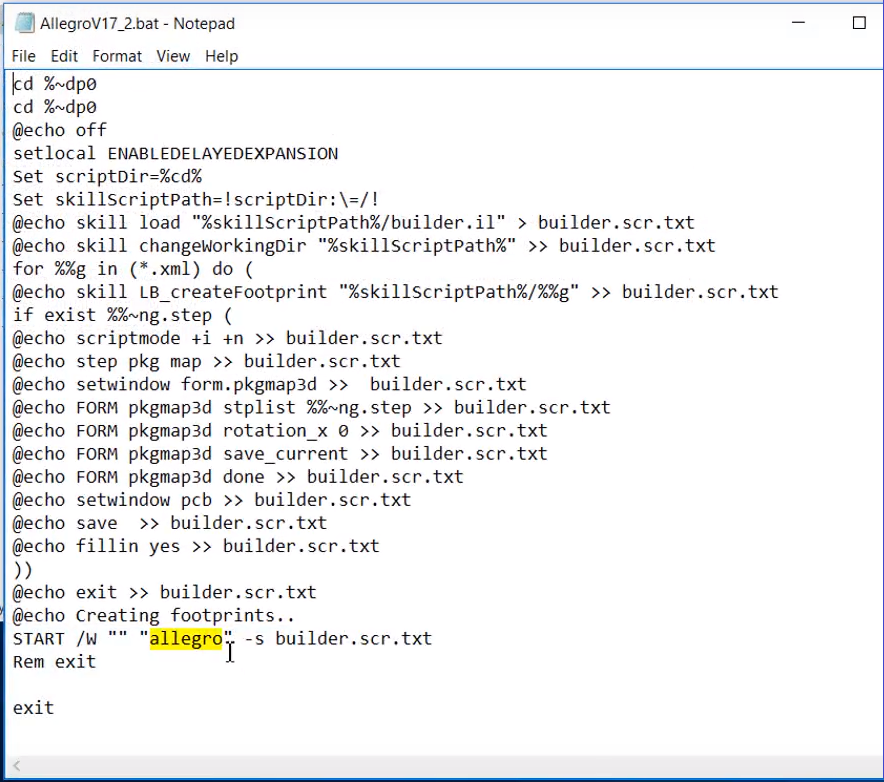
5.Edit the line that references allegro, (highlighted in yellow in the above image) by replacing the reference to allegro with the path to the allegro.exe file.

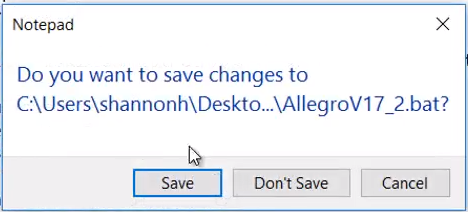
6.Save the file.
7.Double-click the AllegroV17_2.bat file you just saved to run the batch file.
This opens OrCAD/Allegro PCB Editor and generates your footprint and 3D model. The programs closes when generation is completed.
8.Double-click your newly created footprint file to open it.
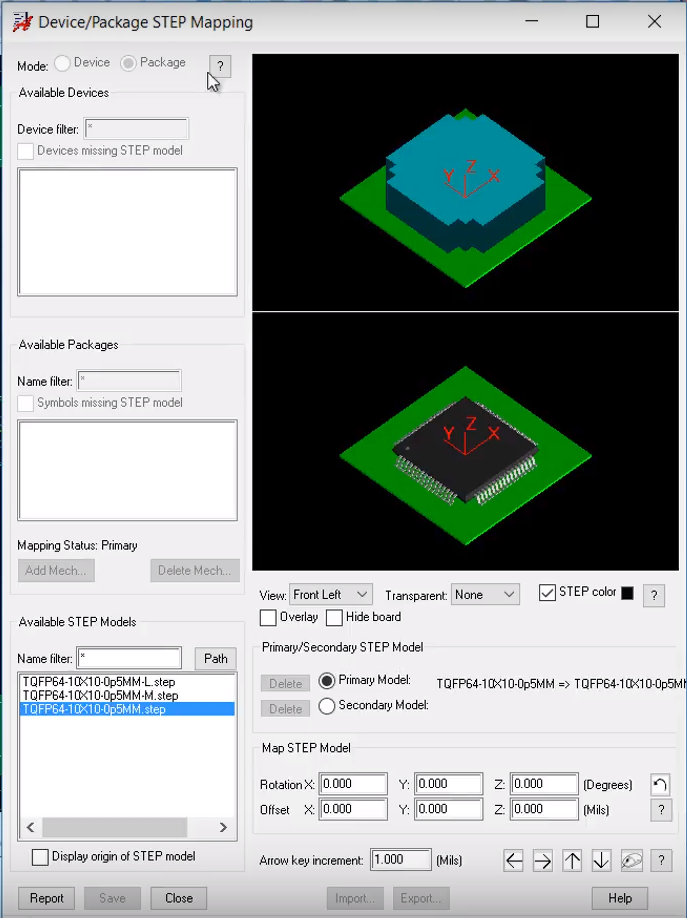
To view your 3D Model, select Setup > Step Package Mapping,