The instructions that follow explain how to import files you download from Ultra Librarian into Pulsonix.
Pulsonix imports schematic symbols, footprints, and parts into separate symbol, footprint, and part libraries. Each type of library item is imported one-at-a-time, following a similar procedure. Before you begin to import, extract the zipped download on the computer drive to a user location that can be accessed from Pulsonix.
To import your new library items:
1.Start Pulsonix.
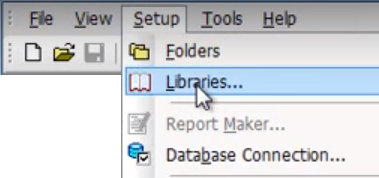
2.Select the Setup menu > Libraries menu items.

3.Click the Add button ![]() to add a new directory where you will save the new object libraries you create when you complete steps 4 and 5.
to add a new directory where you will save the new object libraries you create when you complete steps 4 and 5.
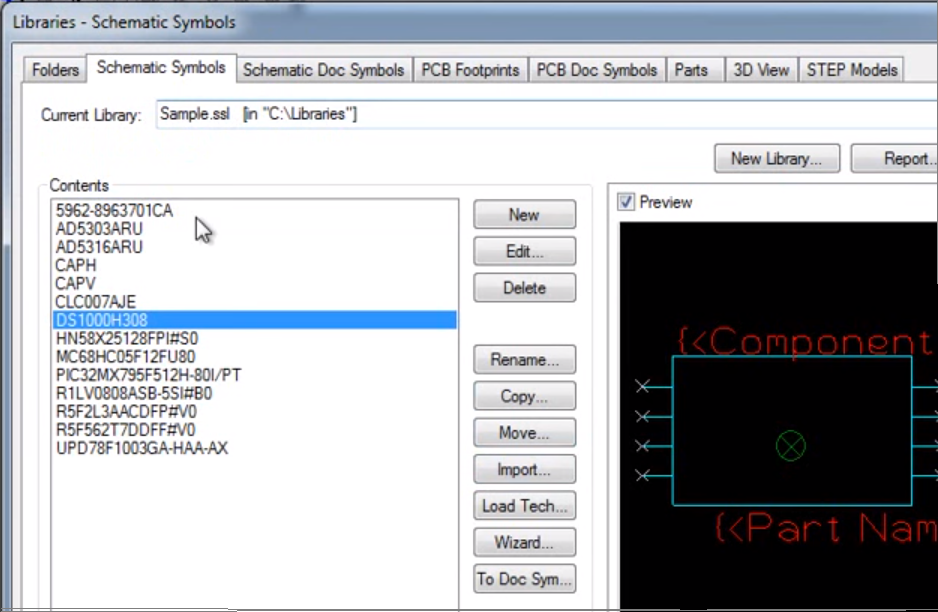
4.Select the tab that matches the type of library object you are importing. For example, if you are importing a schematic symbol, select the Schematic Symbol tab. Or, if you are importing a footprint, select the PCB Footprints tab.

5.Click the New Library button and add a new library to the directory you created in step #3.
6.Select the Import button. ![]()
7.Double-click the library file you downloaded Ultra Librarian, Pulsonix.PLX.
7.If the Pulsonix Technology Transfer dialog screen opens, verify the technology selection is None and click OK to continue.

After Pulsonix generates the type of library files you specified, the Contents pane located in the left part of the screen lists the imported item(s).

7.Repeat steps 3 through 6 for the next type of library object (schematic symbols, footprints or parts) that you want to import. .
Note: If you select a Part from the Library Contents pane you will see the Schematic Symbol and PCB Footprint associated with that Part. This verifies the import process was completed correctly. Your Parts are now ready to use.