The instructions that follow explain how to import files you download from Ultra Librarian into KiCAD software version 6.0+.
To import a symbol library into KiCAD:
1. Open KiCAD and create a new project.
2. Open the project schematic file.
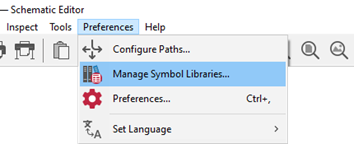
3. Select Preferences > Manage Symbol Libraries from the menu.
4. If importing a project-specific part, select the Project Specific Libraries tab.
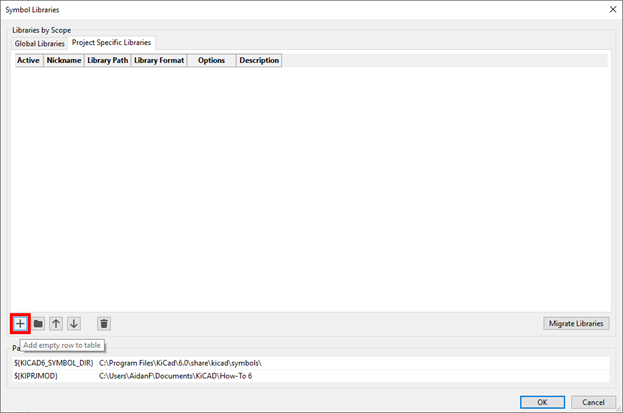
5. Click the Add button to add a new library.
6. Enter the name of the downloaded part for the nickname.
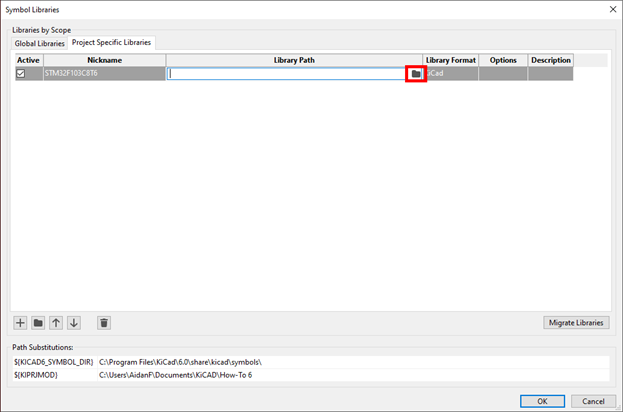
7. Select the folder icon under Library Path to open the file browser.
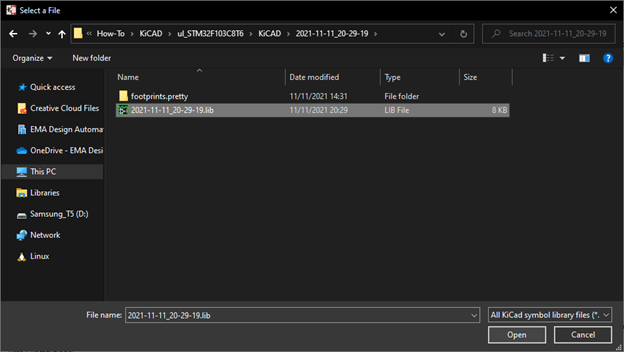
8. Browse to select the [date].lib file from your Ultra Librarian download.

9. Click OK. You have now added the new library and are ready to place the component on your KiCAD schematic.
To import a PCB footprint downloaded from Ultra Librarian:
1. Open the PCB file.
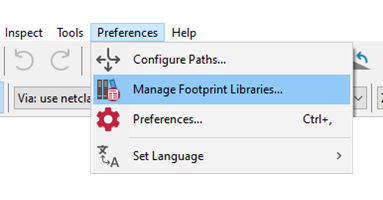
2. Select Preferences > Manage Footprint Libraries from the menu.
Your selection opens the Footprint Libraries window.
3. Click the Project Specific Libraries tab. ![]()
4. Click the Add button. ![]()
5. Enter the part number as the Nickname.
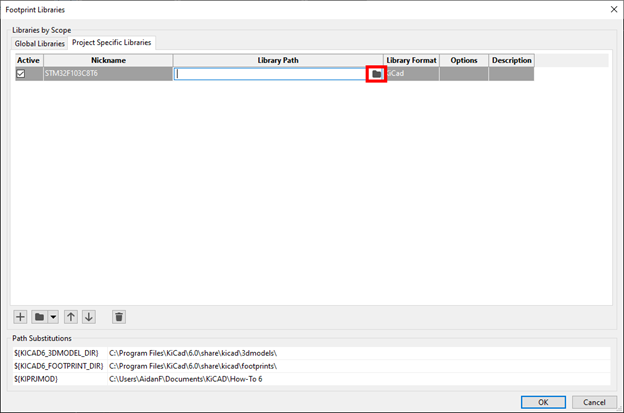
6. Select the folder icon under Library Path.
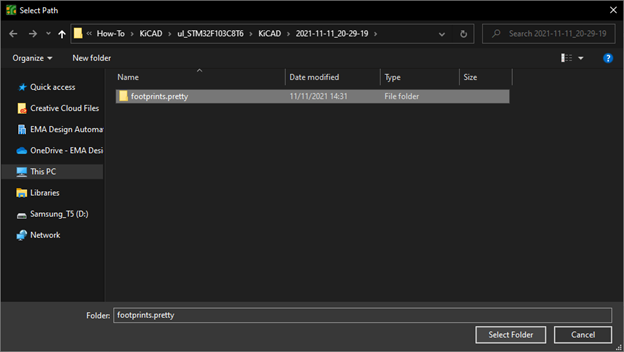
7. Set the path to the .pretty file of the Ultra Librarian export.
8. Click OK.
You have now added the footprint to the KiCAD Symbol Library and are ready to place the footprint on your schematic.
To import a 3D model downloaded from Ultra Librarian:
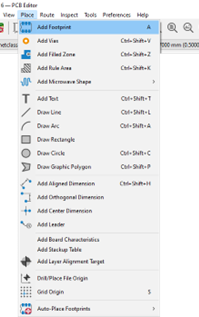
1. Still in the PCB file, select Place > Add Footprint from the menu.
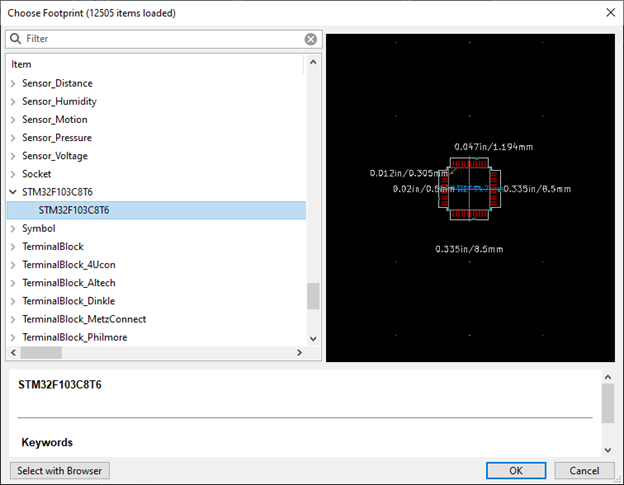
2. Select the desired footprint from the list and click OK.
3. Click to place the footprint in the PCB canvas.
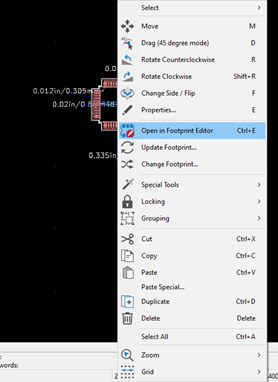
4. Select the footprint, right-click and select Open in Footprint Editor.
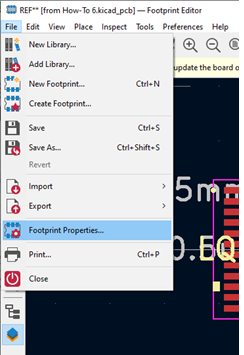
5. Select File > Footprint Properties from the Footprint Editor menu.
6. Select the 3D Models tab in the Footprint Properties window. ![]()
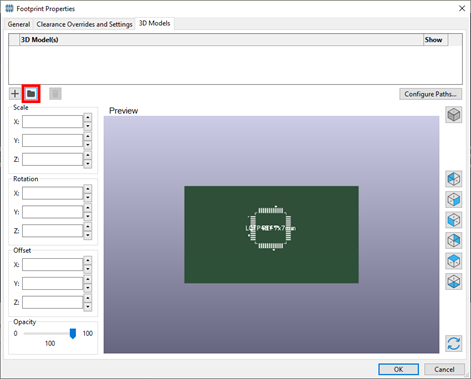
7. Select the Load button indicated with the folder icon to load a symbol.
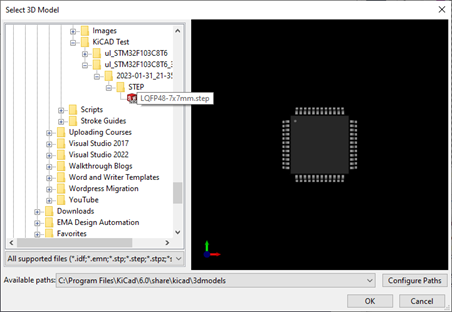
8. Browse to the location of the downloaded STEP file and select it. A preview will appear on the right side of the window.
9. Click OK. The 3D model has been mapped. Click OK again to save the settings and close the Footprint Properties window.
10. Close the Footprint Editor and select Save when prompted.